Large Format Tile Installation: Complete Guide for 2025
Large format tiles (24x24 inches and larger) have become the go-to choice for modern homes and commercial spaces. Learn professional installation techniques and avoid common pitfalls.
What Are Large Format Tiles?
Large format tiles are defined as tiles measuring 15x15 inches (38x38 cm) or larger. Common sizes include 24x24", 24x48", 36x36", and even massive 48x48" slabs. These tiles have gained immense popularity in Vancouver's residential and commercial flooring projects due to their sleek, modern appearance and fewer grout lines.
Benefits of Large Format Tiles
- Seamless aesthetic: Fewer grout lines create a cleaner, more spacious look
- Easier maintenance: Less grout means less cleaning and maintenance
- Modern appeal: Perfect for contemporary design styles
- Durable: Ideal for high-traffic commercial spaces
- Versatile: Works well in bathrooms, kitchens, living areas, and outdoor spaces
Essential Tools for Large Format Tile Installation
Installing large format tiles requires specialized equipment to handle the weight and size:
- Tile leveling system (clips and wedges)
- Large notch trowel (at least 1/2" x 1/2")
- Tile spacers (1/8" to 1/4" recommended)
- Wet saw with diamond blade
- Tile suction cups for handling
- Laser level for precise alignment
- Rubber mallet
- Large format thin-set mortar
Step-by-Step Installation Process
1. Surface Preparation
Proper surface preparation is critical for large format tiles. The substrate must be:
- Completely flat (within 1/8" over 10 feet)
- Clean and free of debris
- Structurally sound with no movement
- Primed if necessary
For Vancouver residential projects, we often encounter moisture issues. Always test for moisture and apply waterproofing membranes when needed.
2. Layout Planning
Start with a dry layout to plan tile placement:
- Find the room's center point
- Snap chalk lines to create quadrants
- Lay tiles without mortar to visualize the final result
- Adjust layout to avoid small cuts at walls
- Mark reference lines for consistent placement
3. Mortar Application
Large format tiles require full coverage on the back to prevent lippage and cracking:
- Use large notch trowel (1/2" x 1/2" minimum)
- Apply mortar to both floor and tile back (back-buttering)
- Maintain consistent trowel angle (45 degrees)
- Ensure 95% coverage for proper adhesion
4. Tile Setting
Setting large format tiles requires precision:
- Use suction cups to handle tiles safely
- Press tile firmly into mortar with slight twisting motion
- Check level immediately after setting
- Install leveling system clips and wedges
- Maintain consistent grout joint spacing
5. Leveling System
A tile leveling system is essential for large format installations:
- Insert clips under tiles at corners
- Install wedges to apply upward pressure
- Tighten until tiles are perfectly level
- Leave in place until mortar cures (24 hours)
- Remove and snap off clip tops before grouting
6. Cutting Large Format Tiles
Cutting requires specialized techniques:
- Use wet saw with fresh diamond blade
- Make multiple passes for thick tiles
- Support tile fully to prevent breaking
- Cut slowly and steadily for clean edges
- Use angle grinder for notches and curves
7. Grouting
Proper grouting completes the installation:
- Wait at least 24-48 hours after tile installation
- Use unsanded grout for joints under 1/8"
- Apply grout at 45-degree angle with rubber float
- Remove excess immediately with damp sponge
- Apply grout sealer after curing (7-10 days)
Common Mistakes to Avoid
1. Inadequate Surface Preparation
Large format tiles magnify any imperfections in the substrate. Even small variations will cause lippage (uneven tile edges). Always use self-leveling compound on uneven floors.
2. Insufficient Mortar Coverage
Hollow spots under tiles lead to cracking. Always back-butter large format tiles and ensure 95% coverage. The industry standard for commercial tiling projects requires full coverage.
3. Wrong Trowel Size
Using a small trowel results in inadequate mortar thickness. For tiles over 15", use at least a 1/2" x 1/2" notch trowel.
4. Skipping the Leveling System
Without a leveling system, achieving perfectly flat surfaces is nearly impossible with large format tiles.
5. Rushing the Process
Large format tile installation requires patience. Working too quickly leads to mistakes that are expensive to fix.
Cost Considerations
Large format tile installation typically costs more than standard tiles due to:
- Specialized tools and equipment
- More extensive surface preparation
- Longer installation time
- Higher skill level required
- Increased material costs
In Vancouver, professional large format tile installation ranges from $12-25 per square foot, depending on tile size, pattern complexity, and site conditions. Request a free quote for an accurate estimate for your project.
Best Applications for Large Format Tiles
Residential Applications
- Open-concept living areas
- Modern bathrooms and showers
- Kitchen floors and backsplashes
- Entryways and mudrooms
- Outdoor patios (with proper drainage)
Commercial Applications
- Hotel lobbies and corridors
- Office buildings and reception areas
- Retail spaces and showrooms
- Restaurants and cafes
- Healthcare facilities
For commercial projects in Burnaby, Surrey, or Richmond, we recommend consulting with professional contractors who specialize in commercial installations.
Maintenance Tips for Large Format Tiles
- Sweep or vacuum daily to prevent scratches
- Mop with pH-neutral cleaner weekly
- Seal grout lines every 6-12 months
- Address spills immediately to prevent staining
- Use felt pads under furniture legs
- Avoid acidic cleaners that can damage grout
Why Hire Professional Installers?
While DIY installation is possible for small standard tiles, large format tiles present unique challenges:
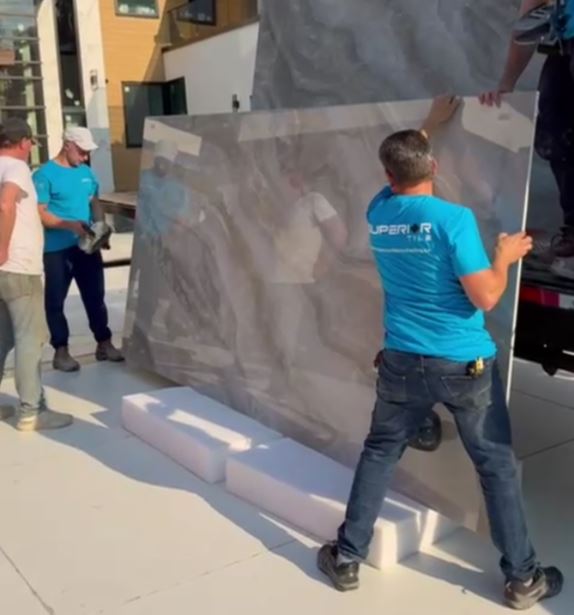
- Weight: Large tiles are heavy and difficult to handle safely
- Precision: Professional installers have the experience to achieve perfect results
- Tools: Specialized equipment is expensive to purchase for one project
- Warranty: Professional installation often includes warranty coverage
- Time: Experts complete projects faster with better results
At Superior Tile Contracting, we've completed hundreds of large format tile installations across Vancouver and the Lower Mainland. Our team uses industry-leading techniques and equipment to ensure flawless results.
Conclusion
Large format tile installation requires careful planning, proper tools, and professional techniques. While the process is more complex than standard tile installation, the stunning results are worth the effort. Whether you're tackling a DIY project or hiring professionals, understanding these fundamentals will help ensure a successful installation.
Ready to transform your space with large format tiles? Contact us for a consultation or request a free quote today!
Superior Tile Team
With over 14 years of experience in tile installation, our team of licensed professionals has completed thousands of residential and commercial projects across Vancouver and the Lower Mainland.
Related Content
Need Professional Tile Installation?
Get a free quote from Vancouver's most trusted tile contractors